
Introduction
Installing an Electronic Logging Device sounds intimidating until you actually do it. For most modern trucks, it's a plug-and-play job you can finish before your coffee gets cold.
Your vehicle's diagnostic port type (OBD-II, 9-pin, or 6-pin) and whether the device connects via Bluetooth or a hardwired cable determine the real difficulty level.
Most drivers and fleet managers can self-install an ELD without ever calling a mechanic. Professional installation still makes sense for older vehicles or hardwired setups, but it's rarely required.
Skip a step, though, and the consequences show up fast: missing Hours of Service data, failed roadside inspections, FMCSA violations, or a device that simply won't sync. This guide walks through prep, installation, and validation so you get it right the first time.
Key Takeaways
- Most ELDs plug directly into a truck's OBD-II, 9-pin, or 6-pin port—no wiring, no tools
- Self-installation takes 10-30 minutes; hardwired professional installs take longer
- Confirm ELD-vehicle compatibility and FMCSA registration before connecting anything
- Validate the app's connection indicator before relying on it for compliance
How ELD Installation Works
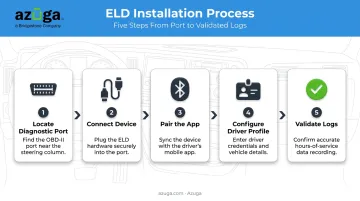
Installing an ELD follows five sequential steps
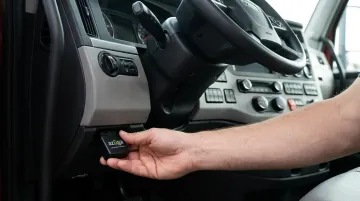
- Locate the diagnostic port, usually under the dashboard near the steering column.
- Connect the device to the port.
- Pair the app via Bluetooth.
- Configure the driver profile with the correct hours-of-service settings.
- Validate the logs to confirm the device is transmitting data.
For most plug-and-play devices, including Azuga's OBD-II tracker, this takes 10 to 30 minutes and requires zero technical training. You won't need a wiring diagram or a service bay.
Fleet-wide rollouts are a different story. Coordinating installation across a dozen or fifty vehicles means
- Scheduling drivers around routes and downtime
- Matching each device to the correct truck
- Confirming every account is set up before drivers hit the road
The individual install is easy. The logistics of doing it at scale is where fleets actually spend their time.
Prerequisites and Safety Considerations
Before you touch the diagnostic port, confirm a few things. Skipping this step is the number one reason installations go sideways.
Check vehicle compatibility first. Review the ELD manufacturer's supported vehicle list and pay close attention to the port type
| Port Type | Common Connector | Typical Data Protocol |
|---|---|---|
| OBD-II (16-pin) | Standard trapezoidal plug | Vehicle diagnostics via J1962 |
| 9-pin | Round, heavy-duty connector | J1939 (some support J1708) |
| 6-pin | Round, heavy-duty connector | J1708 |
Don't assume protocol based on connector shape alone — always verify against the vehicle's VIN and the vendor's cable specification.
Verify FMCSA registration. Federal rule requires that carriers use only devices listed on FMCSA's registered ELD list. Using an unregistered device, even one that works fine mechanically, can trigger a compliance violation at roadside. Azuga's ELD hardware is already on that list, so if you're installing an Azuga device, this check is already handled.
Gather your setup information before you start
- Vehicle Identification Number (VIN)
- Driver's license number and issuing state
- Carrier name and USDOT number
Follow basic safety steps. Park the vehicle, engage the parking brake, and turn off the ignition before connecting anything to the diagnostic port. This prevents electrical feedback and protects both the port and the device.
One non-negotiable: don't proceed if the diagnostic port is damaged, the vehicle lacks a compatible port, or the device itself shows visible defects. Forcing a connection under these conditions usually causes more problems than it solves.
Tools and Parts Required
Modern ELDs need surprisingly little. Gather these before you start
- The ELD hardware unit
- A compatible cable or adapter matching your vehicle's port type (OBD-II, 9-pin, or 6-pin)
- A smartphone or tablet with the provider's app installed
Optional extras that help in specific situations
- A mounting bracket, useful if the device needs to stay fixed and visible from the driver's seat
- An extension cable, for diagnostic ports tucked in hard-to-reach spots under the dash
Specialized tools are rarely necessary for plug-and-play devices. Azuga's OBD-II ELD, for example, is built specifically for drivers to self-install in minutes, with no wiring or professional installer needed, and no service appointment to schedule. Some fleet deployments also use a preinstalled Y-cable, which keeps the device seated firmly and reduces the chance of theft or accidental disconnection.
How to Install ELD (Step-by-Step)
Installation follows a defined order. Skipping steps, especially validation, is exactly how compliance problems show up weeks later at a weigh station.
Locate the diagnostic port. It's typically under the dashboard on the driver's side. If you can't find it, check the vehicle manual since placement varies by make and model.
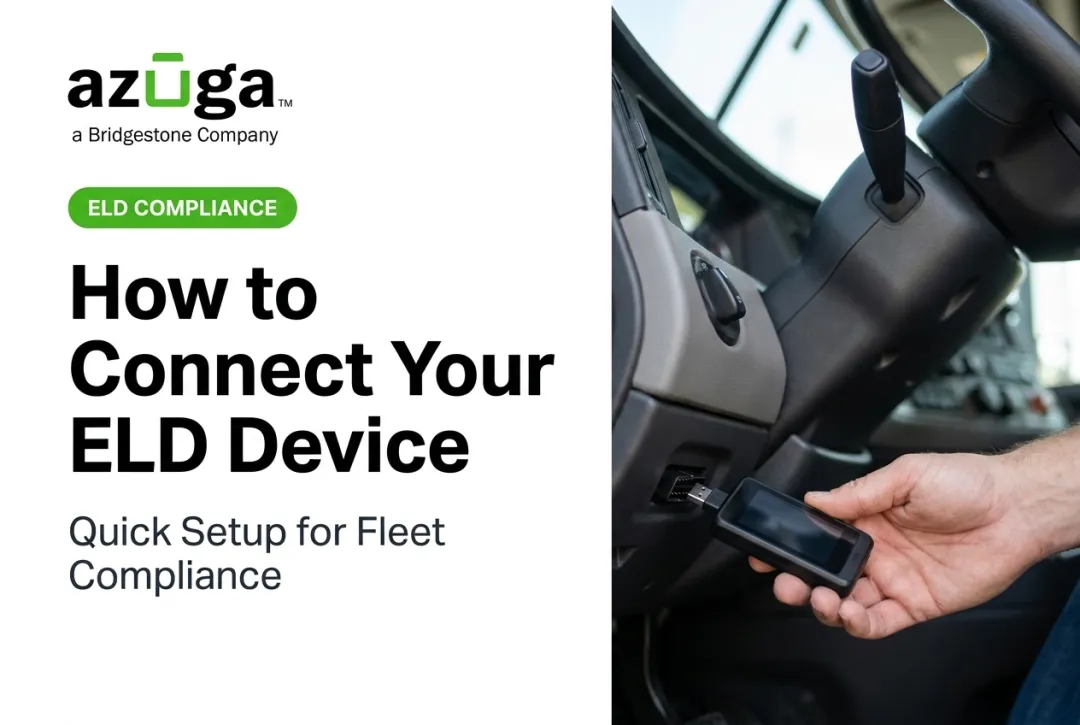
Turn off the ignition, then connect the device. Push firmly until it seats. For 6-pin or 9-pin adapters, twist the locking ring clockwise to secure the connection. With a plug-and-play device like Azuga's OBD-II unit, this step usually takes less than two minutes.
Turn the vehicle back on and watch the LED sequence. Power-up, self-test, then ready-to-pair. This confirms the hardware itself is functioning before you touch the app.
Download the provider's app on your smartphone or tablet, then log in or create your fleet/driver account.
Pair the app with the device. Most modern ELDs use low-energy Bluetooth, which the app detects automatically rather than through your phone's standard Bluetooth settings menu.
Complete the driver profile and vehicle configuration (carrier info, driver ID, and vehicle assignment) so Hours of Service logs start recording correctly.
- If multiple ELDs show up nearby (common in fleet yards), match device ID or signal strength to confirm you're pairing with the right vehicle.
This entire sequence exists to satisfy a specific federal requirement: engine synchronization. For ECM-equipped vehicles from model year 2000 or newer, the ELD must capture engine power status, motion, mileage, and engine hours through a real data connection, not just GPS pings from a phone. That's why step 3 matters so much. A device with lights but no data sync isn't actually compliant yet.
Post-Installation Checks and Validation
Don't walk away yet. A device that's physically connected isn't necessarily working correctly.
Check the connection indicator. The app should show a solid "connected" status, usually a green icon or label, confirming the device is actively transmitting vehicle data.
Run a short functional test. Drive a few minutes and confirm the app logs
- Engine hours
- GPS location
- Duty status changes in real time
Watch for red flags, including
- No LED activity on the device
- Repeated disconnects during the drive
- Failure of the app to detect the device at all
Address any of these before relying on the ELD for daily compliance. Skipping this validation step is why many drivers only discover a "delayed log" failure during a roadside inspection, when there's no time left to correct it.
Common Installation Problems and Fixes
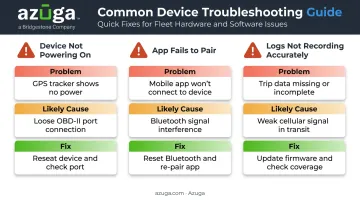
Most post-install issues are minor and fixable without a service call. Here are the three you'll run into most often.
Issue 1: Device Not Powering On
Problem: No lights after connecting to the diagnostic port.
Likely cause: A loose connection, an incompatible cable, or a blown fuse in the vehicle's diagnostic circuit.
Fix: Reseat the connector firmly, then check the vehicle's fuse box. If the fuse looks fine, try an alternate adapter that matches the exact port type.
Issue 2: App Fails to Pair with the Device
Problem: The smartphone app can't detect or connect to the ELD.
Likely cause: Bluetooth range limits, an incomplete boot sequence, or outdated app/firmware.
Fix: Move closer to the vehicle, then wait for the full self-test light sequence to finish before attempting to pair. Update the app, then retry.
Issue 3: Logs Not Recording Accurately After Install
Problem: HOS data shows gaps or the wrong duty status right after setup.
Likely cause: An incomplete driver profile or a mismatched vehicle/VIN assignment in the app.
Fix: Recheck driver and vehicle settings, and confirm the VIN matches. Manually sync logs if the automatic sync hasn't caught up.
If none of these fixes solve the problem, Azuga's support team is available 24/7 by phone or email.
FMCSA also tracks these issues through an official malfunction and data diagnostic code system, with codes like "P" for power compliance and "E" for engine-synchronization malfunctions. These codes flag detected conditions rather than installer error, but they're a useful starting point for diagnosing what's wrong.
Pro Tips for Installing ELD Effectively
A few habits separate a smooth rollout from a frustrating one
- Install during routine maintenance windows, not mid-route, to avoid unnecessary downtime
- Secure the device with a bracket or mount so road vibration doesn't shake it loose over weeks of driving
- Keep installation records, such as photos or connection screenshots per vehicle, to simplify audits or settle roadside inspection disputes
- Choose a provider with responsive support for multi-vehicle rollouts, since something always comes up when you're connecting a dozen trucks in one day
Azuga, for instance, offers 24/7 phone, email, and web support specifically to help fleets get every vehicle connected without delays piling up.
Conclusion
Correct ELD installation isn't a formality. It directly affects HOS accuracy, your compliance standing, and ultimately driver safety on the road. A device that's plugged in but not validated is worse than no device at all, because it creates a false sense of coverage.
Avoiding that false confidence starts with three checkpoints
- Verify compatibility before you connect anything to the vehicle.
- Follow the manufacturer's steps in the exact order listed.
- Validate the connection before relying on it for a daily log.
That last check takes five extra minutes and saves you from a much longer conversation at a roadside inspection. Azuga's OBD-II devices install in minutes, but the same validation rule applies regardless of whose hardware you're running.
Frequently Asked Questions
Where does an ELD plug into a truck?
It connects to the vehicle's diagnostic port (OBD-II, 9-pin, or 6-pin), typically located under the dashboard on the driver's side. Exact placement varies by make and model, so check your owner's manual if you can't spot it right away.
Can I use my phone as an ELD device?
No. A phone alone isn't a certified ELD. It works alongside compliant hardware connected to the vehicle's engine, serving as the display and app rather than a standalone replacement.
What does ELD stand for?
Electronic Logging Device. It's FMCSA-mandated hardware and software that automatically records a commercial driver's Hours of Service, replacing paper logbooks.
How long does ELD installation typically take?
Self-installation for plug-and-play devices usually takes 10-30 minutes. Professional hardwired installs can take longer, depending on the vehicle and cable routing required.
Do I need a professional to install an ELD?
Most modern ELDs are built for self-installation, including Azuga's OBD-II device. Older vehicles or hardwired configurations may still call for a professional install, but it's rarely necessary.
How much does ELD installation cost?
Self-install with plug-and-play devices, like Azuga's OBD-II ELD, is typically free with your subscription. Costs for a professional or hardwired install vary by provider and vehicle complexity, so get a direct quote before committing.